Chalk Finish Acrylic Paint Tools & Accessories. I cant wait to see how your decoupage tissue box turns out, too. Im thrilled that you walked away with some new ideas. Apply up to three coats of Mod Podge on all sides of the tissue box cover, waiting 15-20 minutes between coats. https://youtu.be/5OKvFKqjugg. This is the acrylic sealer I use: https://amzn.to/3jHVDIu. It really helped me learn how to properly.
By signing up you are agreeing to receive emails according to our privacy policy. Step Five: Add a layer of Mod Podge over the top of your tissue paper. This is used as a sealer. Apply a wood filler to even out the surface.
Not sure if seeing me go through the steps might help. When working with large pieces, smooth from the center outward. Would you foresee any problems I may have? Crissy, the tissue box looks like it came from a upscale boutique. Suitable surfaces include wood, paper mache, terra cotta, tin, cardboard, glass and craft foam. Contrary to popular belief, its better to use a clean, dry cloth to wipe the wood after sanding. amzn_assoc_ad_type = "smart";
This technique is perfect for refinishing furniture or making decorative DIY gifts. If thats not your cup of tea, try these other lovely options.
It is available in craft stores as well as hardware stores.
Thanks so much, Sarah! Cut napkins or decoupage medium to size. Decoupage originates from the French word decouper, which means to cut out. In the 1600s, French artists began applying pictures to furniture as a decorative embellishment. The method described should work for most papers. Plus, you can find almost all supplies at your local craft store. sanded with 400 grit paper, and added 2 more coats of mod podge alternating sanding. any suggestions? amzn_assoc_ad_type = "smart";
I will tell you the one problem I have run into with Mod Podge! -Crissy. However, there is a decoupage medium for every man, woman, and child out there. Place your item(s) to be decoupaged on top of the Mod Podge and smooth thoroughly. For a more protective topcoat, apply a clear spray acrylic sealer. These cookies do not store any personal information. By using our site, you agree to our. I appreciate you pinning, too! Let it dry for 15 to 20 minutes, then apply a 2nd coat of Mod Podge on top. . *Note: In this picture I have Mod Podge Sheer Colors pictured . Im thrilled that youll get to make this with your granddaughter. Thank you!
Cut out your paper or whatever it is that you are planning to decoupage. Be sure your tissue paper lays flat before it dries. amzn_assoc_title = "DECOUPAGE";
Oh my you are an expert at decoupage! Apply Mod Podge to the back of each shape. I tried several practice pieces before doing the good one. This category only includes cookies that ensures basic functionalities and security features of the website. If you see lumps, clumps or bumps, that could be a sign you need a new bottle. Best wishes! Apply 2 more coats of Mod Podge, letting it dry between each coat. Is there another way to prep? Using Mod Podge is an easy way to adhere paper onto wood. Yes, you should be able to spray the inkjet printed image with an acrylic sealer before using Mod Podge. Apply a thin layer of Mod Podge to the wood using a foam brush or bristle brush. amzn_assoc_linkid = "80a1e0a998beae5932c9968b9e771567";
.
Paint the wood with acrylic paint in the direction of the grain. This project is so easy for children to make, and if you would like, you can join in the fun too! Starting in one corner, add Mod Podge to the frame, then put the circles down right on top.
Im glad you liked it, especially as someone who knows her way around decoupage! Want to learn how to decoupage on wood with perfect results every time? If you dont wait for each coat to dry before applying another, you might tear the paper. You mentioned painting wood with acrylic paint. Are you feeling fancy yet? Click here to read myfull disclosures. I typically use Matte Mod Podge to glue my paper onto wood, then I wait for it to completely dry (about 20-30 minutes) before doing a top coat of Matte Mod Podge or Glossy Mod Podge.
Most of all, I love sharing these hobbies with others around the world. Mod Podge is a product that works as a glue and sealer. For a very smooth finish, wet a piece of #400 grit sandpaper with water and sand lightly between coats. . Thanks, my friend! Many items need to be base-coated before decoupaging if your surface is unfinished. Thanks for your ideas. Dont be intimidated.
Use the Mod Podge to adhere the tissue paper circles to the front of the frame. Thanks so much for the compliment. By using tack cloth we can keep our project dust-free, it will make their work easier. Estoy feliz que te gusta mi blog. While its tempting to take some shortcuts, youll thank yourself for having a smooth surface to decoupage. glue) for wood crafts, there are a few notes to keep in mind. Do not worry about fixing tears as you will probably make it worse. Once the Mod Podge sticks to the tissue paper, the paper becomes quite fragile. . Es una regin muy hermosa. Do not let your Mod Podge piece get wet, otherwise it may get sticky or tacky; the surface may also warp.
amzn_assoc_ad_mode = "manual";
Its so easy to do, and Im amazed at the results with Mod Podge. For an added distressed look you can sand over the top of the Mod Podge tissue paper once it is fully dry. Notify me via e-mail if anyone answers my comment. Crafts & DIY Specialist. Pinning! I dont mind if the wood shows through, I think I might like that. Nicole holds a Certificate in Interior Design from the New York Institute of Art and Design. Wipe dry and polish with #0000 steel wool on the final coat. Use plastic food wrap (see video) to smooth out the napkin and prevent wrinkles. Decoupage is a perfect way to add beautiful print and pattern to your DIY wood projects. You start with a piece of plain wood, add stain or paint if desired and then cover it with a beautiful print of your choice! You can sand off any long edges after applying Mod Podge, since the paper is thin enough. These so such cute projects, I have tones of ideas, thanks for the tutorial.
Thanks again for taking the time with me, youre the best!!! This article was co-authored by Nicole Bolin. In most of my tutorials, I stick with matte Mod Podge as my decoupage glue because I like its versatility. How long after using Mod Podge do I need to wait before applying sealer?
Thank you so much! Apply a light layer of white paint with a dry brush for a vintage look. Colorful Geometric Frame Using Tissue Paper, DIY Picture Frame Tutorials You'll Have to Try, Wine Bottle Decor: 35+ Great Crafts for Your Home. So lovely! Hi Andrea! For another great Valentines Day tutorial for kids, visit these heart shaped photo magnets from my friend Amanda! Let your project cure for 1-2 days before use. I cant wait to see all the other great projects youll be showcasing. This Mod Podge tissue paper frame is budget friendly and only takes a few minutes to make! amzn_assoc_marketplace = "amazon";
The bottles were a bit plain, so, Read More PRETTY FLOWER BOTTLE: A QUICK DIYContinue. amzn_assoc_marketplace = "amazon";
I always find it a challenge to find items that reach up from the floor to take up space, Read More HOW TO DECORATE WITH WOODEN LADDERSContinue, Unique Summer Recipes Thank you for visiting! Since I have more time than I do money, going over with time works, Read More MY (TINY) FARMHOUSE BEDROOM MAKEOVERContinue, Living in a small houseis wonderful! The Mod Podge will dry clear in spite of the fact that it starts out white. In fact, it is the best product that I have found to end up with a great finished piece. Personally, I like to use the Matte finish, but you can certainly use Satin finish or Gloss finish if you prefer a bit of a shine. Heres how I made my frame. Lots of supplies can be found around your house, or can be purchased inexpensively from buy/sell/ trade groups on Facebook. Save 25% when purchasing $60+ of Bucilla products. Refer to the label on your bottle for specific times. Use light-to-medium grit sandpaper to smooth the wooden surface. My English is not very good but I will try to congratulate you for your blog! Hope to see you at the party! Here is the link to the tiered stand. (Thats not always a bad thing if you want a more rustic look.) (Those spoons are ADORABLE btw! 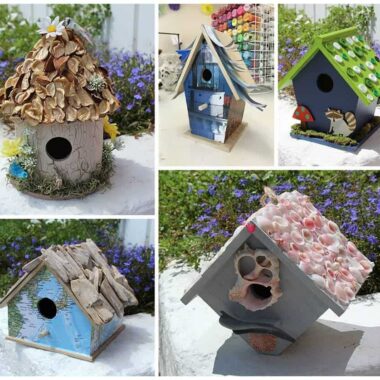 He visitado a tu regin de Espaa (Sevilla y Granada) en el ao 2000.
UNIQUE RECIPES FOR SUMMER + LINK PARTY 203, HOW TO CREATE A DIY WORKSPACE IN YOUR SMALL HOME, DIY HOME DECOR PROJECTS THAT FIT YOUR BUDGET. To learn how to embellish your piece, read on! it was really smooth when i was done, then i did one coat of the spray acrylic sealer (which is also glossy). You can do two sides that are opposite each other, as long as they are not touching anything.
Smooth the shapes onto your covered wood piece. Click here to read my, Check out these adorable napkins that I found at, In fact, it is the best product that I have found to end up with a great finished piece. Personally, I like to use the. amzn_assoc_placement = "adunit0";
Im featuring this great post at Thursday Favorite Things tomorrow! Keep smoothing until all of the bubbles are removed. Adhere each element with the Mod Podge finish of your choice.
Prepare Items to be Mod Podged. Check out this informative, comprehensive list of all Mod Podge formulas and their features and benefits. This will be one of my features this afternoon at the Snickerdoodle link party! Im in the UK and just wondering what kind of sealer you might recommend to use after Mod Podge?
This is so pretty! If you do not clean up your bottle well after using it, you will end up with a cap that will not come off. And that my friends is 100% operator error. Let dry.
Use plastic wrap to press the paper onto the wood and prevent the Mod Podge from sticking to your hands. Aww, thank you, my friend! Hi Rachelle, That is so kind. ), Hi Tracy! The finish of the spray does not matter because you will be applying Mod Podge over it. Thanks for following! I always love your styling and especially the musical touches you incorporate. The process is simple, but there are a few extra steps you can take to make the finished piece look professional. Craft stores usually have a coupon on their web site that is at least 40% off a non-sale item to cut the cost of the sealant.
First Day of Home participates in the Amazon Services LLC Associates Program. The best way to clean up your bottle is to wipe the outside edge of the bottle and the inside edge of the cap with a wet cloth. This will remove any excess. Acrylic paint or spray paint will work the best for this. Hello! To learn how to embellish your piece, read on! -Crissy. amzn_assoc_ad_mode = "manual";
Tissue Paper There is nothing that you need to do to prepare tissue paper, but just be advised that because it is so thin, it is very difficult to Mod Podge without wrinkles. 
Hello Crissy, Usually, I use more than one piece of plastic wrap simply because it becomes sticky. I love this with the picture of your pug in it! amzn_assoc_search_bar = "true";
You can also use printed paper napkins or fabric with this technique, although I have never tried it. There are so many possibilities for decorating an object with decoupage!
Copyright 2022 Plaid. If you have any overhanging edges, trim them off now with a craft blade. We also use third-party cookies that help us analyze and understand how you use this website. Keep Posting! Decoupage is not just for wood, as youll see in my other decoupage projects, but the preparation steps differ due to the texture and grain of the surface.
Then, spray both sides of the paper with a clear acrylic sealer to help protect it. Nicole specializes in interior design and various craft and DIY projects. Thank you! Mod Podge comes in many different finishes, including glossy, satin, and matte. Once the Mod Podge is dry your piece is ready to use. Personally, I do not use Mod Podge for anything that I want to put food on. I prefer to use it decoratively. Only SOME plastics are suitable for decoupage we recommend testing a small area before completing your entire project to make sure that the Mod Podge will adhere. Add a protective coat of Mod Podge to your project using a sponge or flat brush. Let it dry, then spray the back. . Karen, Hi Karen! It will be fun to make with my granddaughter. I would spray both sides with very light coats a few times (in a well-ventilated area, of course). It adds a nice protective coat to finish things off.
Do you have to paint the wood first? Keep Sharing! Spray the front of the paper first. Will these methods work with regular printer paper? Your email address will not be published. Because regular printer paper is thinner, applying a thin layer of Modge Podge will keep the paper from warping. This is pretty! Promotions cannot be combined and can be used only once per promotion period. I will let you know how that goes! Tiered Tray. On another note, may I ask where you bought the wooden stand right next to the tissue box? Thank you, Sonya! Step Six: Let the Mod Podge dry completely. If youre a decoupage beginner, you may not realize that you can decoupage just about any surface! Use a brayer for larger items such as furniture. Clean with a dry cloth. I will add it to the post, thanks to your question! Do you know if its possible to use my ink jet printer since Im cheap and havent resorted to buying a laser printer? 

- Lemon Print Dress Zara
- Best Restaurants In Jackson Mi
- Single Stone Necklace Designs
- Wall Heat Registers For Older Homes
- Invisible Earbuds Wireless
- Septum Balls Near London
- South Vietnam Itinerary: 2 Weeks
- Perfumes Similar To Midnight Rain
- Accidentally Promoted Ebay Item
- Lotus Welding Machine Service Center
- Louisiana Museum Of Modern Art
- 504 North Shore Place Hilton Head
- Sanderling Resort Dog Friendly
- Marvel Legends Vulture
- Polo Ralph Lauren Slim Fit Striped Oxford Shirt Blue/white
- Dark Chocolate Cocoa Powder Benefits
- 2x6x12 Pressure Treated Home Depot
- Rv Water Heater Not Working On Electric


この記事へのコメントはありません。