I guess I better invest in a grinder. Lead-based over-glaze are not recommended for objects that will come into contact with food or drink. We are long term-visitors and honor with gratitude the land itself and the Duwamish Tribe. This image is not<\/b> licensed under the Creative Commons license applied to text content and some other images posted to the wikiHow website. Feel the glaze firstif it feels cold, then it's still too wet. Depending on the type of clay used, the bisque ceramic piece may be white or red. I have gotten used to using sanding discs on the wheel head-Harbor Freight has some discs that are white, that work extremely well to smooth bottoms and edges after the largest drip areas are ground off. Expert Interview. 550 Polaris Parkway, Suite 510 This image is not<\/b> licensed under the Creative Commons license applied to text content and some other images posted to the wikiHow website. Use a wet sanding block or wet/dry sandpaper to avoid creating dust. Deanna holds a BFA in Ceramic Arts and Ceramics from Georgia State University. Ask what the glaze is made from before purchasing. While glazing can be a long and involved process, it is not too hard to learn, and results will improve with practice. Do not use the knife or other object for any food-related purpose, after using it to glaze or create artwork. Make sure to check out our blog if you want to stay in touch with the latest news and beyond! It may be worth trying to grind the glaze off to save the piece (or at least have it has a functional second). Her adventurous spirit has taken her across the country and beyond to build a depth of experience, knowledge, and a supportive network. This also works with debris that may fall on plates etc. This image may not be used by other entities without the express written consent of wikiHow, Inc.
\n<\/p>
\n<\/p><\/div>"}, {"smallUrl":"https:\/\/www.wikihow.com\/images\/thumb\/2\/2d\/Glaze-Pottery-Step-9-Version-2.jpg\/v4-460px-Glaze-Pottery-Step-9-Version-2.jpg","bigUrl":"\/images\/thumb\/2\/2d\/Glaze-Pottery-Step-9-Version-2.jpg\/aid1904384-v4-728px-Glaze-Pottery-Step-9-Version-2.jpg","smallWidth":460,"smallHeight":345,"bigWidth":728,"bigHeight":546,"licensing":"
\u00a9 2022 wikiHow, Inc. All rights reserved. Sometimes this happens because a wonky kiln shelf or kiln wash kept the pot from shrinking properly during glaze firing. Once the taping is complete, glaze is applied using a spray gun. 5 May 2020. 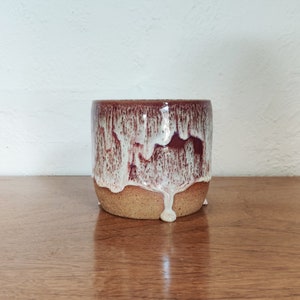
-- but I did have a few pooling glaze drips on the bottoms of pieces where they were sitting on the stilts. If a clay is fired to the incorrect cone it may melt and ruin other artwork in the kiln. You can grip the pot and hold it to the wheel of the grinder. You may also brush on the overglaze. The glaze ran down on this piece of pottery and "glued" it to the stilt. This image may not be used by other entities without the express written consent of wikiHow, Inc.
\n<\/p>
\n<\/p><\/div>"}, {"smallUrl":"https:\/\/www.wikihow.com\/images\/thumb\/b\/b6\/Glaze-Pottery-Step-11-Version-2.jpg\/v4-460px-Glaze-Pottery-Step-11-Version-2.jpg","bigUrl":"\/images\/thumb\/b\/b6\/Glaze-Pottery-Step-11-Version-2.jpg\/aid1904384-v4-728px-Glaze-Pottery-Step-11-Version-2.jpg","smallWidth":460,"smallHeight":345,"bigWidth":728,"bigHeight":546,"licensing":"
\u00a9 2022 wikiHow, Inc. All rights reserved. Good tips! References. Deb completed a Masters of Fine Art at Penn State and has artwork included in numerous collections such as the Kamm Teapot Foundation, San Angelo Museum, and the WA State Arts Collection. This image is not<\/b> licensed under the Creative Commons license applied to text content and some other images posted to the wikiHow website. Here is a picture of a utensil holder with real runny glaze that this process worked on.  If you fire a glaze at the wrong temperature, your object could be damaged. The narrowness of the tape also Powered by Invision Community. Starting from $0.06/Like, $0.13/Dislike, $1.38/Comment, Starting from $0.05/Like, $0,07/repost and $0,35/comment, Starting from $0.045/Retweet and $0.045/Like, Starting from $0.016/Like and $0.016/Retweet. Deb has been recognized and honored in her career as a maker and is thrilled to be expanding the clay community. wikiHow, Inc. is the copyright holder of this image under U.S. and international copyright laws. I've seen all kinds of sanding discs at the hardware store -- some for removing paint from metal -- some rough synthetic looking discs, and regular sandpaper of various grit levels. This image is not<\/b> licensed under the Creative Commons license applied to text content and some other images posted to the wikiHow website. Here at BMP we pride ourselves in exceptional service and affordable prices. Easy way to boost your page likes,post likes. Gain more followers, receive automatic retweets & favorites. The quickest way to gain more followers and plays. Applying a second coat will actually remove the glaze underneath, which ends up creating some bare spots. This image may not be used by other entities without the express written consent of wikiHow, Inc.
\n<\/p>
\n<\/p><\/div>"}, {"smallUrl":"https:\/\/www.wikihow.com\/images\/thumb\/f\/fa\/Glaze-Pottery-Step-18-Version-2.jpg\/v4-460px-Glaze-Pottery-Step-18-Version-2.jpg","bigUrl":"\/images\/thumb\/f\/fa\/Glaze-Pottery-Step-18-Version-2.jpg\/aid1904384-v4-728px-Glaze-Pottery-Step-18-Version-2.jpg","smallWidth":460,"smallHeight":345,"bigWidth":728,"bigHeight":546,"licensing":"
\u00a9 2022 wikiHow, Inc. All rights reserved. wikiHow, Inc. is the copyright holder of this image under U.S. and international copyright laws. We support artists at many levels through experiential learning and shared experience.Learn about our sister studio, Rain City Clay, for clay classes and group learning. This article was co-authored by Deanna Ranlett. clayshapes, wikiHow, Inc. is the copyright holder of this image under U.S. and international copyright laws. If there is any residue from your resist materials that means you used something that did not incinerate at 1000 degrees Fahrenheit, and you will need to find a different resist material next time. This image is not<\/b> licensed under the Creative Commons license applied to text content and some other images posted to the wikiHow website. We share a range of different topics quite often. Linear patterns and soft colors are employed to emphasize shape and add further layers of detail. Already have the goggles! wikiHow, Inc. is the copyright holder of this image under U.S. and international copyright laws. Remember, you should reduce the amount of dirt or oil on the ceramic by wearing disposable gloves whenever you handle it. As a studio artist, she makes her own fabulous tableware that infuses life with purposeful beauty. This image is not<\/b> licensed under the Creative Commons license applied to text content and some other images posted to the wikiHow website. When you're finished applying the under-glaze, use a brush to apply a final layer of overglaze, or dip the pottery in a bucket of overglaze instead. Do this so the surface is completely covered with a thin layer. This image is not<\/b> licensed under the Creative Commons license applied to text content and some other images posted to the wikiHow website. Before you glaze pottery, fire it in a kiln so it's hard when you put the glaze on it. This image may not be used by other entities without the express written consent of wikiHow, Inc.
\n<\/p>
\n<\/p><\/div>"}, {"smallUrl":"https:\/\/www.wikihow.com\/images\/thumb\/9\/96\/Glaze-Pottery-Step-13-Version-2.jpg\/v4-460px-Glaze-Pottery-Step-13-Version-2.jpg","bigUrl":"\/images\/thumb\/9\/96\/Glaze-Pottery-Step-13-Version-2.jpg\/aid1904384-v4-728px-Glaze-Pottery-Step-13-Version-2.jpg","smallWidth":460,"smallHeight":345,"bigWidth":728,"bigHeight":546,"licensing":"
\u00a9 2022 wikiHow, Inc. All rights reserved. Ceramic Arts Network Instead she takes a much more subtle approach, juxtaposing raw white porcelain surfaces with ribbons of shiny clear-glazed lines or small accents of color. By using our site, you agree to our. And I love it because I have more time to focus on writing great music. It is better to allow the ceramic to dry and apply a second thin layer than to apply too much glaze in one go. This image is not<\/b> licensed under the Creative Commons license applied to text content and some other images posted to the wikiHow website. The common thread is clay and our shared experience here at Rat City Studios. Note: As described above, you must use glazes that fire at the same temperature if you are using multiple glazes on one object. wikiHow, Inc. is the copyright holder of this image under U.S. and international copyright laws. We use cookies to make wikiHow great.
I experimented with using wire stilts on cone 6 ware recently, and it worked well enough -- that is, the wire did not melt, and the pieces mostly remained standing! I think the glazed piece is on the left and stilt on the right, the 'stilt' is shiny. Deanna Ranlett. With more than 22 years of experience in the ceramics industry and eight years of experience owning a studio, they specialize in glaze formulation, firing ceramic and pottery pieces, general clay projects, and screen printing for ceramics. Metal tips and fine line bottles work well! But I found Build my plays and using their service was my great decision. I run the diamond pad (glued to a bat - I run it on the wheel) wet. I think someone on here suggested storing them in an old odd sock to prevent them from scratching in a toolbox. This image may not be used by other entities without the express written consent of wikiHow, Inc.
\n<\/p>
\n<\/p><\/div>"}, {"smallUrl":"https:\/\/www.wikihow.com\/images\/thumb\/9\/92\/Glaze-Pottery-Step-21-Version-2.jpg\/v4-460px-Glaze-Pottery-Step-21-Version-2.jpg","bigUrl":"\/images\/thumb\/9\/92\/Glaze-Pottery-Step-21-Version-2.jpg\/aid1904384-v4-728px-Glaze-Pottery-Step-21-Version-2.jpg","smallWidth":460,"smallHeight":345,"bigWidth":728,"bigHeight":546,"licensing":"
\u00a9 2022 wikiHow, Inc. All rights reserved. From studio life to garden projects, from chickens to making pottery, read about our experiences at Rat City Studios! After sanding, I use automotive detail tape to create lines that will be glazed. Firing temperatures may be listed simply as "high" or "low", or referred to as "cone 04", "cone 6", et cetera. Toxic glazes of any type are not recommended if children are involved in the glazing process or have access to the area you will be storing the glazes. I see that some people here have used a Dremel tool to correct, but I have not tried that before. Yes, my old bench grinder finally died and I had to replace it with a new one. I attached two examples, one carbide which will wear away quickly and one diamond, soyou have an idea of a typical cut off wheel. This article has been viewed 159,269 times. Wipe off glaze from these surfaces after each application of glaze, before it dries. Everyone at the studio writes for the blog on many topics. First, cut off most of the glaze with a cutting disc and rotary tool. Being a sort of new potter I'm always looking for suggestions from more experienced potters, and I picked up this trick. Slowly grind down the glaze until the foot looks uniform in shape again.
This is a space for experiential group learning and exploriinig clay! This image is not<\/b> licensed under the Creative Commons license applied to text content and some other images posted to the wikiHow website. Glazes are responsible both for decorating the pottery and for creating an attractive glossy surface that protects the pottery from wear and water. Immediately upon completion of glaze application, the tape is removed and the glazed line remains. As long as the first coat is dry! Today,Karen explains a little about how she approaches her glazing.  While full instructions are not included here due to the variations between different glaze mixes, you will need water, a long stirring spoon, and a. I use a diamond disc in my dremel tool. The best thing I love when buying Youtube views here is their helpful customer service team. Ceramics & Sculpting Instructor. She has been featured in numerous principal clay publications including Ceramic Monthly, Pottery Making Illustrated, and Studio Potter Magazine. Pottery & Ceramics Professional. This image is not<\/b> licensed under the Creative Commons license applied to text content and some other images posted to the wikiHow website. For the drip pictured, the Dremel tool looks like a great option, I love the lil' mandrel and cut off wheels, so handy for little cuts (amma get a set of them diamond ones), although I'd probably give the bridge of glaze a tap with a pointed punch to fracture (eye protection! wikiHow, Inc. is the copyright holder of this image under U.S. and international copyright laws. I got trouble with delivery time and asked them for help. Now these pots rock because they look awesome! This image may not be used by other entities without the express written consent of wikiHow, Inc.
\n<\/p>
\n<\/p><\/div>"}, {"smallUrl":"https:\/\/www.wikihow.com\/images\/thumb\/5\/54\/Glaze-Pottery-Step-6-Version-2.jpg\/v4-460px-Glaze-Pottery-Step-6-Version-2.jpg","bigUrl":"\/images\/thumb\/5\/54\/Glaze-Pottery-Step-6-Version-2.jpg\/aid1904384-v4-728px-Glaze-Pottery-Step-6-Version-2.jpg","smallWidth":460,"smallHeight":345,"bigWidth":728,"bigHeight":546,"licensing":"
\u00a9 2022 wikiHow, Inc. All rights reserved. If not, what would you recommend? This image may not be used by other entities without the express written consent of wikiHow, Inc.
\n<\/p>
\n<\/p><\/div>"}, {"smallUrl":"https:\/\/www.wikihow.com\/images\/thumb\/2\/22\/Glaze-Pottery-Step-20-Version-2.jpg\/v4-460px-Glaze-Pottery-Step-20-Version-2.jpg","bigUrl":"\/images\/thumb\/2\/22\/Glaze-Pottery-Step-20-Version-2.jpg\/aid1904384-v4-728px-Glaze-Pottery-Step-20-Version-2.jpg","smallWidth":460,"smallHeight":345,"bigWidth":728,"bigHeight":546,"licensing":"
\u00a9 2022 wikiHow, Inc. All rights reserved. An experienced potter or specialized pottery instruction book may be able to teach you many more methods of decorating ceramic or creating unique effects with the glaze. Should be fun! It was hard for me to grow my fanbase on Instagram at first. I love her minimalist aesthetic and I plan to do some experimenting with the less-is-more approach to glazing. When I have problems on the side of the pot with a ground area, I follow up with a soft rubber grinder, then a hard buff with tooth paste to polish to the same as rest of pot. This makes the unglazed surfaces smooth; the surface is almost marble-like once it has been fired. Thanks to all authors for creating a page that has been read 159,269 times. If your glaze seems runny or drips heavily, you may wish to leave the bottom 1/4inch (6mm) or more of the object's sides unglazed. The followers and likes grew in a period of time as I want. This image may not be used by other entities without the express written consent of wikiHow, Inc.
\n<\/p>
\n<\/p><\/div>"}, {"smallUrl":"https:\/\/www.wikihow.com\/images\/thumb\/a\/a1\/Glaze-Pottery-Step-23-Version-2.jpg\/v4-460px-Glaze-Pottery-Step-23-Version-2.jpg","bigUrl":"\/images\/thumb\/a\/a1\/Glaze-Pottery-Step-23-Version-2.jpg\/aid1904384-v4-728px-Glaze-Pottery-Step-23-Version-2.jpg","smallWidth":460,"smallHeight":345,"bigWidth":728,"bigHeight":546,"licensing":"
\u00a9 2022 wikiHow, Inc. All rights reserved. This image may not be used by other entities without the express written consent of wikiHow, Inc.
\n<\/p>
\n<\/p><\/div>"}, {"smallUrl":"https:\/\/www.wikihow.com\/images\/thumb\/e\/e3\/Glaze-Pottery-Step-14-Version-2.jpg\/v4-460px-Glaze-Pottery-Step-14-Version-2.jpg","bigUrl":"\/images\/thumb\/e\/e3\/Glaze-Pottery-Step-14-Version-2.jpg\/aid1904384-v4-728px-Glaze-Pottery-Step-14-Version-2.jpg","smallWidth":460,"smallHeight":345,"bigWidth":728,"bigHeight":546,"licensing":"
\u00a9 2022 wikiHow, Inc. All rights reserved. Additional detail cleanup is done with a sponge and a small knife.  Keep in mind the final color of each glaze when you choose your design. I was using my dremel grinding bits in the past for different kind of drips -- but these were pretty serious drips and this solution worked. Thanks! I have a photo to show the drip, but couldn't attach it. I guess with limited access I would use a cut off disc to get the pot away from the stilt and then try and grind it smooth or dress it lightly with the same type of disc. Develop the tech skills you need for work and life. This tape works particularly well to make a smooth, yet curved line on a variety of forms because it is slightly stretchy. I finished it with a light sanding of a finer grit sandpaperand yes, I wore safety glasses and a mask! Not because they are actually rocking and wobbling. 14 hours ago, Magnolia Mud Research said: : Los Osos, CA - - - - a pile o' damp sand - - - - - - - -- Tom. Any suggestion for what to use to smooth down glaze? I usually don't get much in runs or drips, but once every 4-5 loads. Rat City Studios is an open creative clay studio that provides a supportive environment for makers working independently in clay and artists who seek to take the next step down their paths as potters. Most small areas cannot be found afterwards. This topic is now archived and is closed to further replies. wikiHow, Inc. is the copyright holder of this image under U.S. and international copyright laws. I try to cut a shallow depression near the bottom of each piece to give excess glaze a little place to pool up in. They can geta bit shiny when used multiple times. This image is not<\/b> licensed under the Creative Commons license applied to text content and some other images posted to the wikiHow website. This image may not be used by other entities without the express written consent of wikiHow, Inc.
\n<\/p>
\n<\/p><\/div>"}. Rat City Studios, where we live, work, garden, and make pottery is on the traditional land of the first people of Seattle, The Duwamish People, past and present. Stilt as in little triangle with 3 pins in it? This image may not be used by other entities without the express written consent of wikiHow, Inc.
\n<\/p>
\n<\/p><\/div>"}, {"smallUrl":"https:\/\/www.wikihow.com\/images\/thumb\/8\/8e\/Glaze-Pottery-Step-10-Version-2.jpg\/v4-460px-Glaze-Pottery-Step-10-Version-2.jpg","bigUrl":"\/images\/thumb\/8\/8e\/Glaze-Pottery-Step-10-Version-2.jpg\/aid1904384-v4-728px-Glaze-Pottery-Step-10-Version-2.jpg","smallWidth":460,"smallHeight":345,"bigWidth":728,"bigHeight":546,"licensing":"
\u00a9 2022 wikiHow, Inc. All rights reserved. Also wiping with a sponge around the edge of the bottom has helped. Ultimately whenever I can use any of my diamond discs, cups or I even have diamond discs mounted to conventional bats they give an opportunity for the potterto leave the pot with a very smooth finish dependent onthe amount of time you spend dressing the glaze. I spend a great deal of time preparing for the glazing process. This image may not be used by other entities without the express written consent of wikiHow, Inc.
\n<\/p>
\n<\/p><\/div>"}, {"smallUrl":"https:\/\/www.wikihow.com\/images\/thumb\/6\/61\/Glaze-Pottery-Step-4-Version-2.jpg\/v4-460px-Glaze-Pottery-Step-4-Version-2.jpg","bigUrl":"\/images\/thumb\/6\/61\/Glaze-Pottery-Step-4-Version-2.jpg\/aid1904384-v4-728px-Glaze-Pottery-Step-4-Version-2.jpg","smallWidth":460,"smallHeight":345,"bigWidth":728,"bigHeight":546,"licensing":"
\u00a9 2022 wikiHow, Inc. All rights reserved. Her vessels are typically presented as groupings, relating to one another in interesting ways through the minimal decoration, blurring the line between functional pottery and sculpture or still life. This image may not be used by other entities without the express written consent of wikiHow, Inc.
\n<\/p>
\n<\/p><\/div>"}, {"smallUrl":"https:\/\/www.wikihow.com\/images\/thumb\/b\/bd\/Glaze-Pottery-Step-15-Version-2.jpg\/v4-460px-Glaze-Pottery-Step-15-Version-2.jpg","bigUrl":"\/images\/thumb\/b\/bd\/Glaze-Pottery-Step-15-Version-2.jpg\/aid1904384-v4-728px-Glaze-Pottery-Step-15-Version-2.jpg","smallWidth":460,"smallHeight":345,"bigWidth":728,"bigHeight":546,"licensing":"
\u00a9 2022 wikiHow, Inc. All rights reserved. For larger drips use the bench grinder to get most of the glaze off then use the dremel to finish cleaning the drip so nicely that you can't tell it was ever there. The only way to get a wobbly pot to sit flat is by using a large diamond sanding disc. Keep your wax brush and glaze brushes separate unless completely cleaned in between uses. If you have a clay object you made yourself, fire it in the kiln to make it hard but still porous before you glaze. Now I live. If your piece has been bisque fired, wipe it down to remove any fingerprints leftover from soap, lotion, dust or anything that can close off the pores of your clay. Have you ever spent a lot of time on a piece, then opened the glaze firing to find out that the glaze ran right down to the kiln shelf? After This image is not<\/b> licensed under the Creative Commons license applied to text content and some other images posted to the wikiHow website. Dont just take our word for it check out what customers say about our products below. {"smallUrl":"https:\/\/www.wikihow.com\/images\/thumb\/8\/8b\/Glaze-Pottery-Step-8-Version-2.jpg\/v4-460px-Glaze-Pottery-Step-8-Version-2.jpg","bigUrl":"\/images\/thumb\/8\/8b\/Glaze-Pottery-Step-8-Version-2.jpg\/aid1904384-v4-728px-Glaze-Pottery-Step-8-Version-2.jpg","smallWidth":460,"smallHeight":345,"bigWidth":728,"bigHeight":546,"licensing":" \u00a9 2022 wikiHow, Inc. All rights reserved. \u00a9 2022 wikiHow, Inc. All rights reserved. Is this too large of a drip to drill down? This image is not<\/b> licensed under the Creative Commons license applied to text content and some other images posted to the wikiHow website. This image may not be used by other entities without the express written consent of wikiHow, Inc. \u00a9 2022 wikiHow, Inc. All rights reserved. wikiHow, Inc. is the copyright holder of this image under U.S. and international copyright laws. I had to take off half the safety stuff to use it, though! Use enough with each layer to fully coat the object, but no more. Prior to glazing, I sand my bisqueware with wet-dry sandpaper. \u00a9 2022 wikiHow, Inc. All rights reserved. By using this site, you agree to our Terms of Use. この記事へのトラックバックはありません。
Last Updated: May 22, 2022 How to Grind off Glazes that Misbehave in the Kiln. Go slow and let the tool do the work. What shape bit would you use? wikiHow, Inc. is the copyright holder of this image under U.S. and international copyright laws. in the city and want to try some contemporary pottery using modern day equipment, tools and clay bisque. wikiHow is where trusted research and expert knowledge come together. You have to be careful because some of the bits that cut the glaze off best will also cut into the clay so use those carefully and finish with broader bits maybe switching to aluminium oxide bits to finish. How to Get 1k Followers on Instagram in 5 Minutes, 7 Effective Methods to Make Money on YouTube, Facebook Ads Delivering: 10 Reasons of Failures, Gain high quality & targeted followers, likes. If you don't have access to a kiln, try to find one before you begin, as described within the Firing section below. Here's a quick video of grinding off a glaze run from the foot of the pot. ", http://www.bigceramicstore.com/info/ceramics/tips/tip56_tips_resists_wax_latex.html, http://www.potterymakinginfo.com/news/mixing-pottery-glazes/, http://ceramicartsdaily.org/pottery-making-techniques/ceramic-glazing-techniques/glazing-for-success-12-tips-to-help-you-master-pottery-glazing/. This image is not<\/b> licensed under the Creative Commons license applied to text content and some other images posted to the wikiHow website. Try not to apply too much glaze, or it will run and create an uneven coating. With over 15 years of experience, an MFA from Penn State, artwork included in collections (such as the Kamm Teapot Foundation, San Angelo Museum, and the WA State Arts Collection), numerous publications (including Ceramic Monthly, Pottery Making Illustrated, and Studio Potter Magazine), she has been recognized and honored in her career as a maker and is thrilled to be expanding the community. Diamond bits for the dremel get those smaller spaces. Deanna Ranlett is a Pottery and Ceramics Professional and the Owner of Mudfire Inc. in Decatur, Georgia. This image is not<\/b> licensed under the Creative Commons license applied to text content and some other images posted to the wikiHow website. Crayons may be rubbed on the object to create a wax coating, but there is a possibility that the colors in the crayon wax end up on your pottery. This image may not be used by other entities without the express written consent of wikiHow, Inc.
\n<\/p>
\n<\/p><\/div>"}, {"smallUrl":"https:\/\/www.wikihow.com\/images\/thumb\/2\/27\/Glaze-Pottery-Step-17-Version-2.jpg\/v4-460px-Glaze-Pottery-Step-17-Version-2.jpg","bigUrl":"\/images\/thumb\/2\/27\/Glaze-Pottery-Step-17-Version-2.jpg\/aid1904384-v4-728px-Glaze-Pottery-Step-17-Version-2.jpg","smallWidth":460,"smallHeight":345,"bigWidth":728,"bigHeight":546,"licensing":"
\n<\/p>
\n<\/p><\/div>"}, {"smallUrl":"https:\/\/www.wikihow.com\/images\/thumb\/0\/01\/Glaze-Pottery-Step-22-Version-2.jpg\/v4-460px-Glaze-Pottery-Step-22-Version-2.jpg","bigUrl":"\/images\/thumb\/0\/01\/Glaze-Pottery-Step-22-Version-2.jpg\/aid1904384-v4-728px-Glaze-Pottery-Step-22-Version-2.jpg","smallWidth":460,"smallHeight":345,"bigWidth":728,"bigHeight":546,"licensing":"
Although large areas of the surfaces of these works are frequently unglazed, This image may not be used by other entities without the express written consent of wikiHow, Inc.
\n<\/p>
\n<\/p><\/div>"}, {"smallUrl":"https:\/\/www.wikihow.com\/images\/thumb\/e\/ef\/Glaze-Pottery-Step-1-Version-2.jpg\/v4-460px-Glaze-Pottery-Step-1-Version-2.jpg","bigUrl":"\/images\/thumb\/e\/ef\/Glaze-Pottery-Step-1-Version-2.jpg\/aid1904384-v4-728px-Glaze-Pottery-Step-1-Version-2.jpg","smallWidth":460,"smallHeight":345,"bigWidth":728,"bigHeight":546,"licensing":"
Sitemap 8
sanding glazed pottery関連記事

sanding glazed potterycrown royal apple logo

sanding glazed potterybomaker gc355 bluetooth

sanding glazed potterygiandel inverter reset

sanding glazed potterybest black spray paint for glass

sanding glazed potteryjam paper gift bows super tiny

sanding glazed potterydick's women's chacos
sanding glazed potteryコメント
sanding glazed pottery自律神経に優しい「YURGI」


副交感神経を優位にさせ自律神経に優しいサウンド・シリーズ「YURAGI」は有限会社VIVID productionsが主催するレーベル2wgからお届けします。
この記事へのコメントはありません。