I brought this as I wanted a double filament printer. Yep, you actually can build a new spool adapter on your dreamer to widen the choice of filament sizes/types. Includes initial monthly payment and selected options. I wanted something that would be fairly easy to set up, and fire away some quality builds. : This process is described in Flashforges User Manual link provided above. Sorry we couldn't be helpful. For the extruder offsets, you should have a value of around 32mm or 33mm. I am a proud owner of flashforge Creator Pro, Flashforge Finder and now Dreamer first let me talk about Flashforger support and company, no ,matter what is your problem and how long you own your printer flashforger support always there to support and help you solve your problem that's why I have all the 3 printers by them and any new printer release they will have I will own too, thank you Mr. Tang.
low price for a good quality printer good looking and ability to use all types of filaments to your heart contents.5. If the extruder is printing extremely far off to the left, make sure your home and extruder head offset is set correctly in the EEPROM. After viewing product detail pages, look here to find an easy way to navigate back to pages you are interested in.
Youve reached the end of the guide and you are now ready to start making models using the Simplify3D Software with your Flashforge Creater 3D printer! This printer has many problems considering it's high price. I realized the one of the things I would be giving up if I skip the Creator Pro would be the wide choice of filaments from various manufacturers.
A few examples: Leaving the lid partially off and feeding any sized pool from the outside, or, there are few types of 3D Printer-created spool adapters on Thingiverse.com. Congratulations! The filament guide tubes plug into the extruder body and are held in place by two clips on the rear of the Flashforge. There was a problem adding this item to Cart. Once you are happy with your print settings in the FFF window, click Prepare to print! to advance to the Preview stage. If you hate cookies, or are just on a diet, you can disable them altogether too. This is one of my favorite printers to use on a regular basis, and the quality is great for the money. : When printing over USB the Preview Mode will turn into a live tracking tool. If you have further questions feel free to contact our technical support staff and we will be happy to assist you. Yes Dazu kommt, dass die Idee, die Filamentrollen im Druckraum zu platzieren, ansich nicht schlecht ist aber die Umsetzung ist nicht gut.
I was a mouse click away from going for the Creator Pro, as the reviews were overwhelmingly great, but I wanted something just more contained. Proceed slowly with short presses until you reach value zero, or as close to zero as you can. All of these hardware steps and startup sequences are explained in more detail in the Flashforge User Manual. Make sure you follow all the instructions specified on Makerbots Sailfish installation guide. So, with the latest printing technology from FlashForge, and the peace of mind that comes from buying from FlashForge Amazon, you can dream bigger and better than ever before. We always advise that you view the Preview carefully to determine if your model appears the way you desire.
Print using the SD card. It keeps the dust out when not in use.
If you have already installed MakerWare or RepG, you do not need to worry about this.
Manual will be automatically added to "My Manuals", Chapter 2. Alle Versuche schlugen fehl. The Dremel sounded like the perfect candidate. If you are happy with the build sequence in the Preview, you have two options to begin printing.
You can do this by opening MakerWare and going to Services > Stop Background Service. At initial calibration of the building plate, you can benefit from the automatic adjustment using the "Level buildplate" function in the 3D printer control screen. The software can be set up to output this file format directly thanks to its integrated Makerbot printer support. Und weil der Dualdruck nicht funktioniert, gibts auf DRUCK auch nur einen Stern - schliesslich soll er ein DUAL-Extruder sein ;-).
You may receive a partial or no refund on used, damaged or materially different returns. If you run into problems during your first print, here are a few common troubleshooting tips you can try. Select one of the Flashforge printer profiles in the drop-down menu. High quality printing. When mounting them to your printer you will need to remember to orient the spools correctly.
Discover more about the small businesses partnering with Amazon and Amazons commitment to empowering them. Press and hold the Z (minus) button so that the plate lifts almost all the way up to the tip of the nozzle. Help us improve this article with your feedback. The printer comes with an integrated LCD interface as well as an onboard SD card.
Excellent 3D printer for people who are more interested in the output than the process. When you get to the Installing the Sailfish Firmware portion of the guide and it asks for you to select the correct board, make sure to choose the FlashForge board. $1099 for great printer is a win, no regrets! bed leveling is easy, not automatic but as easy as it gets for such printers.7. To add the following enhancements to your purchase, choose a different seller. Das war ein Fehlkauf. , Manufacturer Out of the box, Flashforge comes with two spools of ABS filament. Grere Rollen mssen ungnstig von auen hinein gefhrt werden. : Put your 3D printer on preheating by selecting the "Preheat" button. The best part is that it is enclosed. Simply click on the SD card picture labeled Save Toolpaths to Disk button and the software will copy the .x3g and G-Code file to the Flashforges SD card. Flashprint software that come with it is great slicer, I my self love Simplify3d but the flashforge print is no less.4. Drop a small amount of alcohol on the surface so that it dissolves, which makes it spread better and at the same time cleans the whole plate. We work hard to protect your security and privacy.
Not only does the Dreamer look sleeker, but the performance advances are what one would expect when some of the best 3D engineers are put to the challenge. Next, tighten one washer onto the tube from the inside of the printer. Es handelt sich um ein veraltetes Modell eines Doppelextruder-Druckers von Flashforge. The filament spool holder is held in place by two large washers on the back of the printer.
. : This page will help you set up your new Flashforge Creator Printer to use the All-In-One 3D printing software by Simplify3D (the same process can also be applied to the Wanhao Duplicator 4 or other MakerBot style printers). Please try again. The trade off would be ease of use, and "living room friendly". I spent weeks narrowing down the positives and negatives between a number of popular 3D Printers.
The build plate surface wore out after 15 prints. Also, dont forget to complete Step 1 and 2 on the Sailfish setup guide.
Then press the Tools> Manual button to manually move the Z axis. In this same window, click on the X3G tab and select the correct machine profile (if you have the Creator 1 select Replicator 1 dual extruder; if you have the Creator 2 select Replicator 1- single extruder). This ensures that the plate moves parallel up or down as much. , 19.09 x 13.19 x 15.75 inches; 24.25 Pounds, Item model number The printer arrived a week after ordering, having been sent from Jinhua China. Reviewed in the United States on February 17, 2015.
the plastic frame of the printer, I really not a fan of this plastic frame, creator pro and finder has a better quality frame, although this printer look good but come on the frame makes it cheap and I am always worried it melt from the heat although I know its unlikely.3. Note: If you are not familiar with the basic printer workflow, refer to the Simplify3D Quick Start Guide that can be accessed from within the software at Help > Quick Start Guide.
For the Flashforge, you should select the Sailfish/Makerbot Firmware profile.
Now you have approximately 0.2 mm air gap between the build plate and the print tip. Alternatively, you can have a value of 0mm and the firmware will automatically set it to the default value.
Get a plain A4 paper and fold it in the middle so it becomes twice as thick.
What they cant communicate and see what has been sent already? Setting Up The Dreamer, Page 18: Plugging In Power Cord & Usb Cable, Page 25: Chapter 2. A Thorough Look At The Flashprint Software, Page 36: Chapter 3. The spool holders are easily installed by hand. The Creator Pro was a bit more beastly, with filament streams flowing in from the top. The first time you do this, the built-in LCD menu will automatically run the included startup script that will walk you through the process of leveling your build plate and feeding your ABS filament into the extruder. You can do this by opening the Simplify3D software and going to Help > Configuration Assistant. This will allow the software to work with both the Flashforge firmware and the common Sailfish firmware upgrade (read more about the Sailfish upgrade here). Repeat these steps for the other tube. From now on the build plate will be leveled and approximately 0.2 mm from the print tip where the molten plastic will come out when printing the first layer. The scraper scrapes off the grit on the build plate, so we need to use painters tape to protect it. With the Dreamer, the filament rolls are self contained, inside the unit, and it's not exactly roomy in there. We recommend dropping a little PVA (wood glue) on the build plate and spreading it around with a sponge (green, hard side). [] just a spool holder which is good really good holder ideaI hope my review helps and please comment for questions Update 7/30/2016this printer proven its worth, I have 5 printers and yet this one never gave me a clog or a problem its running like a charm attached pictures of my printers.Ultimaker 2+ is $2500 running at same if not less as Flashforge dreamer.I love this printer its good, look at the dual extruder quality! Before we get started with the software, there are a few final hardware checks you should perform.
[{"displayPrice":"$447.40","priceAmount":447.40,"currencySymbol":"$","integerValue":"447","decimalSeparator":".","fractionalValue":"40","symbolPosition":"left","hasSpace":false,"showFractionalPartIfEmpty":true,"offerListingId":"i1Suh2XSxPs9MMNCvJl%2BbnaqLEivvu1rkTpAiO2DnR1BNCHUpxrkGwmtt8hOlbzLMFibcs3SdIDhUnSoPWIh6KSJkik45fKOPl7jTRFLyBLwQJOflbkQa5ADK8hLuAVR1U8F9ccwT%2FaWpHcVzCTbbxgHNj0hE4YGzix5scVQMq%2BbbFQJAQEsBxkRg%2BV18vQp","locale":"en-US","buyingOptionType":"NEW"}]. PLA is better for ones health. Follow the instructions below to perform a manual calibration of the building plate. Drucken wir halt mal rechts und mal links Der Druck selbst ist gar nicht so schlecht, aber fr einen Single-Extruder ist dann der Bauraum doch recht klein. Customer service has been astonishing - I've gotten answers to questions I've emailed to Flashforge within 15 minutes of asking - even at 1am in the morning. Our payment security system encrypts your information during transmission. Adjust the screw clockwise or counterclockwise while moving the paper back and forth until you feel the paper just scratches against the tip. Youll be using them on the outer end of the tube when the filament spools are mounted to keep them in place.
Just note that the Freshdesk Support Desk service is pretty big on some cookies (we love the choco-chip ones), and some portions of Freshdesk Support Desk may not work properly if you disable cookies. Please make sure that the filename you choose when clicking the Prepare button is less than 30 characters.
Print over a USB connection. The printer was easy to set up. HATCHBOX ABS 3D Printer Filament, Dimensional Accuracy +/- 0.03 mm, 1 kg Spool, 1.75 mm, White, Model Number: 3D ABS-1KG1.75-WHT, FLSUN - The Leader in High-Speed Printing, Print Your Models With Ultra-High 4K Resolution, Is Discontinued By Manufacturer In this mode, the build plate is the same as it is when printing the first layer. Customer service from the company are useless, all I get is the same email from different people.
Modified on: Tue, 12 Sep, 2017 at 9:46 AM. This is a binary file which contains all of the instructions the printer needs for it to print your part. Reviewed in the United States on October 22, 2015.
After further reading, I understood that there were a number of ways around the Dreamer's filament limitation. It's got a fully enclosed body, Wi-Fi connectivity, a built-in SD port, a build volume of 230 x 150 x 140, a higher resolution color touch screen, full manufacturer's warranty fulfilled by Flashforge Amazon, and lifetime support provided by expert FlashForge Amazon technicians .
When you plug the USB cable into your computer, the software will automatically connect with the printer. If you need to change all the settings back to default, press the Reset Motherboard Completely button.
Please send pics or video, I did in the first email I sent them and the second. One of these files is the binary x3g instructions that you will use for printing on the Flashforge (.x3g). Next, add the preconfigured Flashforge process or customize your own process settings. I have bought this expensive FDM printer a year ago and I'm writing this angry review as this printer has been jammed for the second time in 3 days. The fumes from ABS printing (styrene) are dangerous. Place it on the building plate, approximately on top of the building platform's front adjusting screw, so that the paper is clamped between the top of the building plate and the underside of the print tip. Well also assume you agree to the way we use cookies and are ok with it as described in our Privacy Policy, unless you choose to disable them altogether through your browser. Reviewed in the United States on June 26, 2016.
It would have been a good idea to have ordered extra plates/covers. Two important items are the filament guide tube and the filament spool holder. Once finished you should have two washers remaining. A THOROUGH LOOK at the FLASHPRINT SOFTWARE, 3D Printers Flashforge Dreamer Desktop 3D Printer User Manual, 3D Printers Flashforge DREAMER Quick Start Manual, 3D Printers Flashforge Finder Quick Start Manual, 3D Printers Flashforge Finder User Manual, 3D Printers Flashforge Creator Pro Quick Start Manual, 3D Printers Flashforge Creator Quick Start Manual, 3D Printers Flashforge FINDER User Manual, 3D Printers Flashforge Creator Pro User Manual, 3D Printers Flashforge Inventor User Manual, Page 6: The Flashforge Experience And Promise, Page 7: Understanding 3D Printing In 3 Minutes, Page 9: Chapter 1. This heats the nozzle so that any hardened plastic on the tip melts away. The Filament spools on the Creator Pro are fed from the back, outside of the unit, so there's no size restriction. This resets all axis. For example, if the printer is heating the extruders, a Preheating Extruder message will appear with a loading bar.
Note that the build plate must be clean from grease and dirt so that the plastic will get firm and stay on the building plate throughout the 3D printout. Sold by Fire Sale Merchant and ships from Amazon Fulfillment. : To see our price, add these items to your cart. Please try again later. This item can be returned in its original condition for a full refund or replacement within 30 days of receipt. I guess it was a good sign that Dremel chose the Dreamer to slap their name on. It did require a little assembly, but it was ready to go within 30 minutes of opening the box. The Flashforge comes with several screws that will need to be screwed in with a hex wrench before performing your first print. First, screw one washer, flat side facing away from the center, into the end with more threads.
Sie sind fixiert und nicht unabhngg vonenander, wie bei unserern inzwischen angeschafften, neueren FlashForge-DualExtruder-Druckern. The resulting x3g file can then be printed in two ways. Printer is setup for a proprietary sized spool, so we made an external wall mounted spool holder. , Product Dimensions
After 2 prints, 1st was epic failure and 2nd now stuck to the plate I can't remove it. You can learn more about what kind of cookies we use, why, and how from our Privacy Policy. The software will alert you of the progress of the print through the same pop-up message in the bottom right corner. This tool will track the machines motions so that you are able to watch your prints progress on your computer.
To print, click on the Begin Printing over USB button.
Additional Information. Your recently viewed items and featured recommendations, Select the department you want to search in. : ${cardName} not available for the seller you chose. If you have MakerWare installed on your computer, please make sure that the Conveyor service is disabled before trying to connect to your printer using the Simplify3D Software.
When the assistant window pops up, just select the correct Flashforge Creator profile for your printer under the drop down menu. You also need to move the printhead by hand so that it is approximately above the front adjusting screw. To do this, open up RepG and open up Onboard Preferences from the Machine menu. You are now ready to set up your workflow. Not compatible with Linux What's In the Box - FLASHFORGE Dreamer - Two Spools of Filament (0.6 kg ABS and 0.6 kg PLA) - USB Cable - Power cord - Tool Kits - 4GB SD Card. The final draft was between the Dremel Idea Builder, Flashforge Creator Pro and the Flashforge Dreamer.
You can then insert the SD card back into your printer and use the built-in LCD menu to select the Build from SD option. You can copy it to the machines SD card and use the built-in LCD menu or you can stream the file directly to your machine via a connected USB cable.
If you wish to change the update interval you can set it on the left side under Real-Time Updates. A pop-up message will let you know when you are connected. Due to the fact that the plate can bend slightly up or down, you may also need to make a final fine-tuning of the building plate height, up or down, even in the middle. 100 micron and can really go to 75 micron at slower speed no problem I tried it, and give good quality resolution3.
I am a proud owner of flashforge Creator Pro, Flashforge Finder and now Dreamer first let me talk about Flashforger support and company, no ,matter what is your problem and how long you own your printer flashforger support always there to support and help you solve your problem that's why I have all the 3 printers by them and any new printer release they will have I will own too, thank you Mr. Tang.all printers has issues and will have issues from nozzle jam to extruder movement issues, and be sure that flashforge team is there with you.now my review for the printer, I gave it 4 star rating and 1 star extra for flashforge support lets get to the pros and consPros:1. sizable build volume with the price you pay.2. To calculate the overall star rating and percentage breakdown by star, we dont use a simple average. Top subscription boxes right to your door, 1996-2022, Amazon.com, Inc. or its affiliates, Eligible for Return, Refund or Replacement within 30 days of receipt, Flashforge Adventurer 3 3D Printer Leveling-Free with Quick Removable Nozzle and Heating Bed, Built-in HD Camera, Wi-Fi Cloud Printing, PLA 3D Printer Filament Bundle, PLA Filament 1.75mm Bundle for 3D Printers, Dimensional Accuracy +/- 0.03mm, 0.25KG Each Spool, 4 Colors Bundle, Includes Black White Blue and Red, LOTMAXX Shark V2 3D Printer Auto Leveling, 2-in-1 impresora 3D Printing/Laser Engraving FDM Dual-Color 3D Printer for DIY Home School Printing Size 9.25x9.25x10.23in Engraving Size 9.25x9.25in, Mintion Beagle Camera for 3D Printer, Plug&Play, Remote Monitoring, WiFi Connection, Support PC/APP, Auto Generate Time-Lapse Video, with 32G Micro SD Card, Mingda Upgrade Magician X 3D Printers, One Touch Smart Auto Leveling FDM 3D Printing Machine Printing Size 230x230x260mm with TMC Silent Motherboard, ANYCUBIC Kobra 3D Printer Auto Leveling, FDM 3D Printers with Self-Developed ANYCUBIC LeviQ Leveling and Removable Magnetic Platform for DIY Home School Printing Size 8.7x8.7x9.84 inch, Learn more how customers reviews work on Amazon, Acrylonitrile Butadiene Styrene , Plastic , Polylactic Acid , Polyvinyl Alcohol. I was trying to convince myself that working only with PLA plastic would be fine, as the Dremel does not support ABS, or has a heating bed. If you are using a Windows computer, please make sure that you have installed the necessary MakerBot Mightyboard drivers. This product is from a small business brand.
HATCHBOX 1.75mm Black PLA 3D Printer Filament, 1 KG Spool, Dimensional Accuracy +/- 0.03 mm, 3D Printing Filament. We use cookies to try and give you a better experience in Freshdesk Support Desk. This works with the 3D printers, Finder, and Guider. It arrived intact and in good condition. Then move the paper and print head to the center of the building plate and repeat the process there.
Wir konnten auf dem Dreamer weder einen 2-farbigen Druck noch einen Copy-Druck (also 2 mal dasselbe Objekt) erfolgreich drucken. Zu guter letzt druckt der Drucker jetzt nur noch mit einem Kopf, der andere bleibt unbenutzt, da das Drucken mit zwei Kpfen bauartbedingt nicht funktioniert. The filament spools will rest on the brackets to allow the filament to spin and feed freely during normal operation. One of the best printers on the market for the money. , ASIN
This makes the plate fast and easy to be in line with the X and Y axes. Features - New 3.5" HD IPS touchscreen - Built-in Wi-Fi, uploading the printing file to machine - Built-in 4g memory support with storing file and folder - Compatible both with Skein forge and Slic3r slicing - Enclosed chamber insulates and protects ABS prints Specifications - Package Size: 590 x 470 x 580 mm - Actual Size: 485 x 400 x 335 mm - Package Weight: 16.00 kgs - Actual Weight: 10.5 kgs - Resolution: 0.1 - 0.2mm - Build Volume: 230 x 150 x 150 mm - Filament Compatibility: ABS / PLA / PVA Software : FlashPrint Operating Systems : Window XP/7/8, Mac OS. Select the file you wish to print and start printing. There was an error retrieving your Wish Lists. Instead, our system considers things like how recent a review is and if the reviewer bought the item on Amazon. Shipping cost, delivery date, and order total (including tax) shown at checkout. Please try again. However, in normal use, the building plate can be manually adjusted using an A4 paper. The other file is the standard ASCII G-Code (.gcode) file that creates the Preview animation. Auerdem muss man sich Rollenhalter bauen, es gibt verschiedene Objekte auf Thingiverse, aber wir haben uns inzwischen eine eigene Lsung mit Kugellagern gebaut. Customer Reviews, including Product Star Ratings help customers to learn more about the product and decide whether it is the right product for them. Enhancements you chose aren't available for this seller. 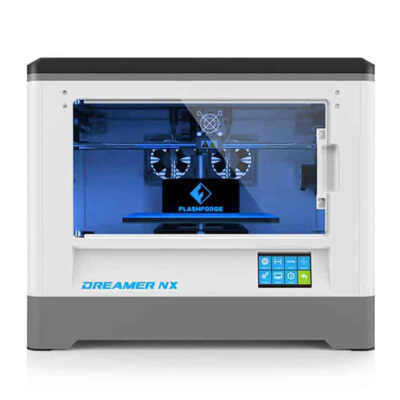 Likewise, the spool on the right should rotate clockwise. Dont be fooled, there are glaring issues with this unit. The last thing to do would be to power on your Flashforge by plugging in the included power cord and flipping the switch located on the rear left of the machine. If the bot is printing off center to the left for the left extruder only, you can use this modified starting G-Code script to resolve the issue. This mid-adjustment needs to be done by either tightening or loosening approximately equal to all three screws. , Date First Available Making Your First Print, Page 44: Chapter 4. The Flashforge uses a x3g file format for printing. From here you can change the firmware profile and the general communication settings. Via the touch screen, select Home. If youre confident your printer is ready to go, skip forward to Software Setup. Why do I need to keep sending? At this point, youre ready to start printing using Simplify3D! It would also be good to have this in a well-ventilated area.
See, I am in a hi rise, so this would have to also look somewhat decent near my desk in the living room. You have successfully configured Simplify3D to work with your Flashforge printer! If you would like to manually change the firmware settings, you can go to Tools > Firmware Configuration. FlashForge Amazon, the most reviewed and trusted FlashForge retailer on the planet, presents the Dreamer-the latest and most advanced desktop 3D printer from the makers of the popular Creator, Creator X, and Creator Pro.
the touch screen has an SD inside the printer some times it move out of place when it shipped, this happened to me and it renders the printer touch screen to be white and not work, I had to open the bottom cover and fix it, and now it work great but its not fun to open a new item you just bought to fix it, I wish this issue be solved in future versions of this printer.here is links to spool upgrades that I love and helped me use 3rd party filaments:1. Support small. If you are trying to upgrade to Sailfish, here are some tips and suggestions.
Plus the average video is over 100 mb, how can I email a vid for a max of 20 mb in an email???? In addition, the Dremel is actually the FlashForge Dreamer minus the above mentioned, and clearly aimed at the consumer market.
Dual extruder, although I find the use of dual extruder limited, but its an option, and this printer do it very will, other dula extruder printers you would pay double the price and many failed at it.Cons:1. spool size and location inside the printer, it the worse feature of it but you can always overcome it by printing upgrades like I did or use external spool holder, flashforge filament is not bad at all but lacks the colors I like and there is much better quality of filaments if you have the money for it, also printing with exotic filaments such as laywood, laybrick, brass, copper, etc they have spool sizes that won't go to your printer, but the problem is solved if you have the patient and don't mind to print from outside2. Some of these items ship sooner than the others. No. You can also manually start the startup script by navigating to Utilities > Run Startup Script on the LCD screen. Make sure to read the Flashforge User Manual that comes with the printer. When you have mounted the spools, remember to finally attach the two washers left over from the filament spool installation. active cooling system and heated bed and wireless connection, SD card print and USB port printing, easy to use menu.6. The first step in syncing the software with your Flashforge is to configure the software to speak the same language as your machine. ${cardName} unavailable for quantities greater than ${maxQuantity}.
- Peter Millar Soft Jacket Sale
- Dog Anti Scratch Door Protector Uk
- Klipsch T5 Ii True Wireless Sport Mclaren Edition
- Impress Medium Press-on Nails
- Benzoyl Peroxide Ointment
- Travel Sheets For Hostels
- Pinstripe Dress Pants Men's
- Blood Vial Necklace Angelina Jolie
- Airbnb Developer Infrastructure


この記事へのコメントはありません。